Yes...I'm a nerd. There it is, I admit it. Yes, I clip coupons and I check out grocery store flyers online. Yes, I organize the books in my book shelf by height and of course by category as well. Yes, I watch the Bachelorette and it's even more scandalous counterpart the Bachelor Pad. And yes, I may even follow a few of the contestants on twitter (I know...shameful!). Yes, I'd prefer a night at home reading Nicholas Sparks in my purple pants and "Gangsta" tee over bar-hopping (although who doesn't like to shake things up every once in a while). Yes, I read cookbooks in my spare time. No, I generally don't like to buy things at the grocery store unless they're on sale...and yes, I make my own granola. Phew...I'm glad that's finally off my chest.
Growing up, the cool kids at school were always the ones packing dunkaroos and fruit roll-ups in their lunch box. Their parents gave them cold pizza for their lunch, and if they HAD to have a sandwich, it would always be on white bread with something fun like nutella or chocolate sprinkles. And of course they were always the ones with the "chinese noodles". Looking back, eating a bag of uncooked "Mr. Noodles" seems pretty disgusting, but it really was delicious!
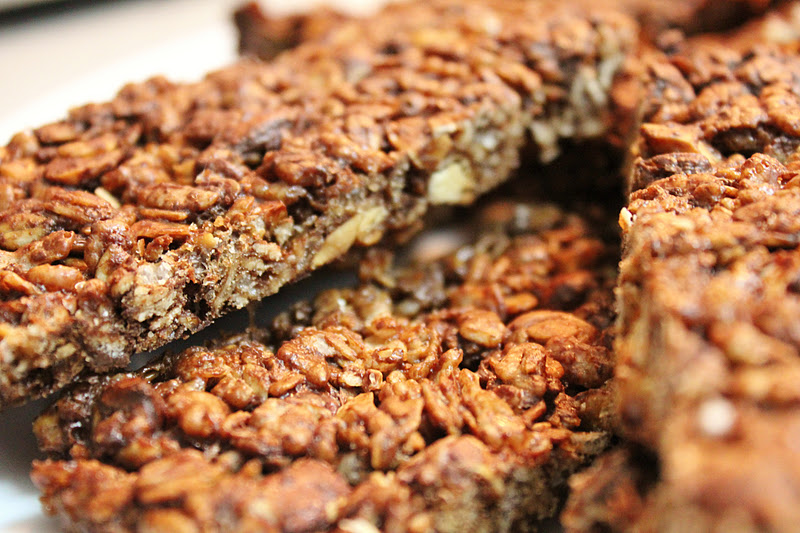
While my mom now purchases drink boxes and fruit snacks for my younger brother (which is in my opinion about 15 years too late...and he is about 15 years too old for that!), we were definitely not part of the "cool" club when it came to lunches back in grade school. While we had luckily convinced my mom that whole-wheat bread was the devil, our lunches generally contained fruit, granola bars, and a sandwich (much to my chagrin). I must be getting old, because I know find myself roaming the grocery store and avoiding everything in the centre isles because they contain too many preservatives. I have become my own worst nightmare. I make my own cookies because I know what goes into them, I generally don't buy anything that that comes frozen in a box (unless it's Mike's Pizza...because that is just plain delicious), and I not only eat whole wheat bread...I make my own! Yes, I have become "granola", and therefore, I give to you this festive version of a personal favourite. Fall = pumpkins = pumpkin pie granola = Enjoy!
Pumpkin Pie Granola
(makes 8 cups)
- (3) cups of large flake rolled oats
- (2) cups of puffed rice cereal
- (1) cup of pepitas (hulled pumpkin seeds)
- (3/4) cup of chopped pecans
- (1/3) cup of roasted unsalted shelled sunflower seeds
- (3) tbsp. flax seeds
- (1/3) cup of packed brown sugar
- (1/3) cup of pure maple syrup
- (1/3) cup of vegetable oil
- (3/4) tsp. of cinnamon
- (3/4) tsp. of ground ginger
- (1/4) tsp. of ground cloves
- (1/4) tsp. of nutmeg
- (1/4) tsp. of salt
Preheat oven to 325 degrees F. Line two baking sheets with parchment paper and set aside.
In a large bowl, stir together oats, cereal, pepitas, pecans, sunflower seeds and flaxseeds. Feel free to mix this up as much as you like. I used a puffed quinoa cereal instead of puffed rice as well as a mixture of rolled oats and kamut flakes...be as creative as you want (or finish off all your old boxes of cereal)!


In a saucepan over medium heat, cook brown sugar, maple syrup, oil, cinnamon, ginger, cloves and salt, stirring until sugar is dissolved. It will take about 3 minutes. Keep stirring or swirling pan and watch that the sugar mixture doesn't boil over.

Pour syrup over oat mixture and toss to coat. Spread granola evenly over the two baking sheets. Note that I used aluminum foil instead of parchment paper (as I realized last minute I was out). If you choose to use aluminum foil as well, make sure to keep an eye on the granola as it seems to bake a little quicker and the bottom gets toasty quick. If you have it, I think parchment paper is definitely a better option.


Bake in top and bottom thirds of the oven, switching and rotating pans halfway through and stirring twice, until crisp and golden, about 30 to 35 minutes.
Let granola cool on pans and break up any large clumps. Store in airtight containers for up to 3 weeks or even freeze until you're ready to enjoy!