Pages

3.27.2011

rainbow trout with lemon and dill.


A walk to our local farmer's market today inspired our menu for dinner. Joe and I are traditionally more drawn to roast beef or steak, but we thought we should broaden our horizons (and palette) and opt for a a nice piece of fresh fish. 
The Atwater Market in Montreal is about a 45 minute walk from our apartment, but definitely worth the trek. They sell everything from maple syrup to local Quebec cheeses, monstrous heads of garlic imported from France, and even sausage made from spinach. If they don't sell it, you really don't need it.
The "Poissonnerie" at the market has an amazing selection of fish brought in from all over Canada. There were huge lobsters and scallops from the East coast, fresh Atlantic salmon, Cod, shrimp...you name it! We were looking for something with a slightly less "fishy" taste with a lot of potential for great flavour. While everything looked fantastic, we left with a nice piece of Rainbow Trout from Ontario, and some great advice and tips from our local fishmonger.
This recipe is very simple and HEALTHY and allows the freshness and the flavour of the fish to be the star. Although I made this dish using Trout, it will also work great with other milder tasting fish such as Haddock or Tilapia. When buying fish, always count on about 1/2 a pound or 0.22 kg of fish per person. 


Poached Rainbow Trout with Lemon and Dill

- (1) fillet of fresh Rainbow Trout
- (1) tbsp. extra virgin olive oil
- (1/2) tsp. salt or garlic salt
- (1/2) tsp. pepper
- (1) tsp. dried dill or (1) tbsp. minced fresh dill
- (1) tsp. grated lemon rind
- (1/2) of a lemon, sliced
- the juice of half a lemon


Preheat the oven to 350 degrees F. Place fillet on a large sheet of aluminum foil with the skin side facing down. Brush fish with olive oil. Season with salt, pepper and dill. Grate lemon rind and sprinkle on top of fish. Slice half of a lemon into slices and place on top of fillet.


Squeeze the juice of the remaining half lemon over the entire fish. Fold the foil around the fillet to form a packet. Place the foil packet on a baking sheet and bake in preheated oven for approximately 15-17 minutes for a 1 pound fillet. Adjust cooking time depending on the size of your fillet, making sure the reddish colour of the fish has turned completely pink. Remove from oven and open packet carefully, as steam may have built up inside. The fish should separate from the skin easily using a spatula. Serve with your choice of sides.


 Cutting Back?
There is no need to worry about adding any inches with this recipe. Fish in general is a great source of low-fat protein, but fish such as Rainbow Trout, Salmon and Tuna pack the added benefits of Omega-3 fatty acids. Stay away from pre-packed side dishes, as they normally contain your daily recommended intake of sodium in only one serving!

3.25.2011

friday night pizza.


Friday night pizza has been a tradition in my parent's house for as long as I can remember. Whether we ordered in, popped in a Delissio, or made those tasty little english muffin pizzas reminiscent of my childhood, if it was Friday night...we were eating pizza. While the pizza toppings and beverage of choice have slowly evolved over the years, the ritual continues, and Joe and I have stayed true to this tradition since we've been married.

Pizza is one of those dishes where the sky really is the limit. If you've got a good base, fresh ingredients, and of course some nice cheese, you're golden. I must admit that I often take the easy route and use store-bought crusts. They are super easy to use and taste amazing. For this pizza, I used President's Choice Blue Menu Multigrain Thin pizza crust and it turned out fabulous. It is a slightly smaller crust, so if you're cooking for more than 2 people, I'd suggest making a couple pizzas.

This recipe is perfect for a romantic night in served with a glass of wine, or even cut into smaller wedges and served as an appetizer.


Caramelized Onion, Proscuitto and Goat Cheese Pizza

- (1) pizza crust or extra-large pita
- (1) tbsp. extra virgin olive oil
- (1) head of roasted garlic (see instructions below)
- (1) tsp. dried basil or a handful of fresh basil
- (1) caramelized onion *
- (6-8) slices of proscuitto
~ (8 oz.) goat cheese, or 1/2 of a 454g tube
- (1/2) cup of shredded mozzarella

The first step to making this pizza is to roast the head of garlic. It is a lot easier working with the garlic when it's not straight out of the oven and piping hot, so this can even be done a couple hours in advance. Some recipes will suggest wrapping the garlic in tin foil or drizzling with olive oil, but I have found that simply popping the head of garlic into the oven works the best. Preheat your oven to 375 degrees F, and once it comes to temperature, place the head of garlic directly on the rack. Bake for 45 minutes to an hour, making sure that the garlic cloves are soft to the touch when done. Allow to cool and cut the woody end off the head of garlic with a sharp knife. At this point you'll be able to squeeze the one end of the head of garlic and the roasted cloves will slide right out.

 
* The next step is to caramelize the onions. To caramelize onions is really just to bring out their natural sugars by heating them. While you don't really need to add anything to the onions to caramelize them, adding the vinegar and brown sugar add a nice colour and sweetness to the onions which contrasts nicely with the goat cheese and proscuitto. 

Caramelized Onions

- (1) tbsp. butter or margarine
- (1) large onion or (2) small onions, sliced into rings
- (1) tbsp. balsamic vinegar
- (1) tsp. brown sugar


Heat butter in frying fan over medium to low heat. Slice onions into thin rings and add to butter. Saute slowly stirring often and making sure not to blacken the edges. Add balsamic vinegar and brown sugar to onions and stir. Continue to saute on low until onions completely soften and become a nice golden brown colour.


Finally, constructing the pizza. Place pizza crust on on a pizza tray. Brush lightly with extra virgin olive oil. Squeeze the roasted garlic cloves onto the crust and spread evenly over the entire pizza. Season with basil. If using fresh basil, roughly chop and sprinkle over the crust. Spread on caramelized onions.

Top with sliced proscuitto. Note that the proscuitto used on this pizza was home cured and slighly thicker than store-bought proscuitto.

 Crumble goat cheese on top and sprinkle with mozzarella.


Place pizza in an oven preheated to 375 degrees F. Bake for 20 to 25 minutes, checking on the pizza closer to the end as baking times will vary depending on the oven. Let the pizza rest for a couple minutes, then slice and serve.


Buon Appetito!


Cutting Back?
Another healthy option when making your own pizza is to use an extra-large whole-wheat pita for the crust. They are nice and thin and crispy and a few less carbohydrates than a regular pizza crust. Omitting the proscuitto and mozzarella will also cut out a lot of fat with out sacrificing too much flavour. This is a great idea if you're catering to vegetarians as well.

3.23.2011

best ever banana bread.


On a recent trip to the grocery store, my husband Joe and I were stocking up on fruit. We grabbed a couple apples, a couple oranges, and Joe went to grab a couple bananas. He came back with 8 bananas and I was puzzled. It's just the two of us, and I'm really not huge banana eater, but Joe was sure he'd eat them all.  About a week later, there they were, 3 brown bananas sitting on the counter. I knew it! When I asked Joe about it, he admitted it was all part of his plan because now I'd have to make banana bread...very sneaky!

I have tried hundreds of different recipes for banana bread over the years, but I must say, this is one of the best. I wanted to make a banana bread that was super moist, super banana-ey (?) and slightly less dense and greasy than many others I've tried. A lot of traditional banana bread recipes call for vegetable oil, and while I've always tried to consider this tasty snack one of my 5-10 daily servings of fruit, the grease ring it left on my napkin made me question my theory. After much experimenting and recipe altering, I do believe I've hit the jackpot.

This recipe calls for plain, fat-free yogurt, but feel free to experiment with 2% yogurt, flavoured yogurt, or even sour cream.

Banana Bread

- (1) cup mashed bananas
- (1) cup plain, fat-free yogurt
- (1/4) cup of margarine
- (2/3) cup of white sugar
- (2/3) cup of brown sugar
- (2) eggs
- (1) tsp. vanilla extract
- (2) cups of all-purpose flour
- (1) tsp. baking soda
- (1) tsp. baking powder
- (1/4) tsp. salt

Preheat oven to 350 degrees F. Grease one 9 x 5 inch loaf pan. This recipe JUST fits in here, so if your loaf pan is slightly smaller, you may want to consider dividing the batter between two loaf pans. 
Mash bananas until lumps are gone and combine with yogurt in a bowl. Set aside. 


In a large bowl, cream together the margarine, white sugar and brown sugar until smooth. Beat in the eggs one at a time and add the vanilla. Stir in the banana mixture. 


Combine the flour, baking soda, baking powder and salt together in a separate bowl and stir into the banana mixture once it is well mixed. Spread batter evenly into the prepared pan.


Bake for 50 minutes in the preheated oven, or until a toothpick inserted in the centre of the loaf comes out clean.


Cutting Back?

As far as baking goes, this recipe has already cut out a couple major calorie culprits. Be sure to use the plain, fat-free yogurt if you're looking for a healthier alternative and opt for a whole grain flour instead of all-purpose flour. You can try either whole wheat flour, brown rice flour or spelt flour. Substituting the entire amount of all-purpose flour with a whole grain flour can sometimes change the consistency of the bread, so I would recommend using 1 cup of all-purpose flour and 1 cup of alternative flour.

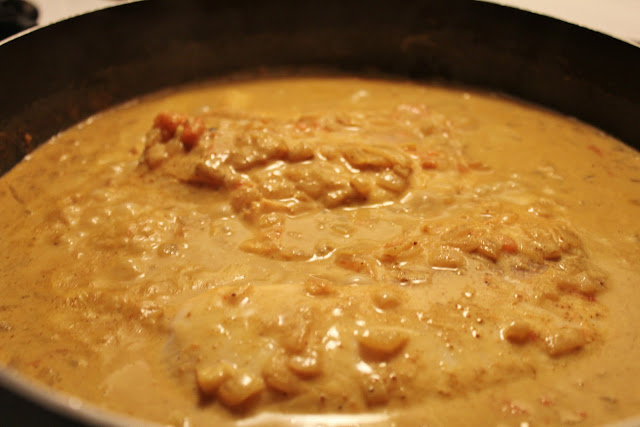
coconut curry fish.


This recipe was passed down to me from my mom (as many good recipes are) and is courtesy of the Canadian Living Kitchen. I grew up on this dish and for many years, this was the only way I'd EVER eat fish. My palette is much more refined these days :)
While any type of white fleshed fish will work in this recipe, Tilapia (also known as St. Peter's fish) is my favourite. It's a firm fish, so it won't flake apart in the curry sauce, and you'll barely even know you're eating fish!

Coconut Curry Fish

- (1) tbsp. vegetable oil
- (2) onions, chopped
- (3) cloves of garlic, minced
- (2) tsp. curry powder
- (1) tsp. salt
- (1/2) tsp. pepper
- (1) can (400ml) coconut milk
- (1) cup diced tomato, skin removed*
- (1/2) cup of chicken stock
- (10) whole allspice
- (2) lbs. white-fleshed fish (kingfish, grouper, tilapia, or red snapper)
- (1/2) tsp. lime juice
 - (2) green onions, sliced

In a shallow Dutch oven, heat oil over medium heat. Cook onions and garlic for approximately 5 minutes, or until softened. Add curry powder, salt and pepper. Stir for 1 minute. Pour in coconut milk and chicken broth and stir. Add in diced tomato and allspice. Bring to a boil.


* The easiest way to peel a tomato :

Score the skin of the tomato into four quarters using a sharp knife. This will allow you to remove the skin easily in four sections.

Place the tomato into a deep container and cover with boiling water. Be sure that the entire tomato remains covered by the water. Using a container with a lid can be helpful. Let the tomato sit in the water for at least 5 minutes

 Remove the tomato from the water and allow to cool for a minute or so. At this point you should be able to pull the skin off the tomato very easily with your hands.


Reduce heat and simmer curry sauce for 25 minutes. Add fish to sauce, cover and cook for 10 minutes or until fish flakes apart with a fork. Discard allspice. 

Serve fish and curry sauce over a bed of jasmine rice. Sprinkle with green onions and season with a dash of lime juice.


Cutting Back?
If you're looking for a way to cut a few calories from this recipe, try substituting light coconut milk for the original. Light coconut milk has 60% less fat than the original without sacrificing the taste.
Using brown or whole grain rice will also cut back on the sugar and increase your intake of fibre.

3.22.2011

mushroom stuffed pork tenderloin with roasted potatoes.


There's nothing better than a hearty "Sunday Night" dinner in the middle of the week. This recipe is sooo simple, but everyone will think you spent the entire day in the kitchen. I love one-pot wonders and in the words of Ron Popeil, you can definitely "set-it and forget it". 

Mushroom Stuffing

- (1) tsp. olive oil
- (1) tsp. butter or margarine
- (1) cup of sliced mushrooms
- (1) small onion, diced
- (1/2) an apple, diced (save the other half to top the roast)
- (1) stalk of celery, diced
- (1/2) cup Italian breadcrumbs
- (1) tsp. sage
- (1/2) tsp. thyme
- salt and pepper

Heat oil and butter in a frying pan over medium heat. Add mushrooms, onions, apples and celery. Season with salt and pepper. Saute until softened (approximately 5-7 minutes). Remove from heat and place in a mixing bowl. Add breadcrumbs, sage and thyme to the bowl and stir until moistened. Set aside.

Pork Tenderloin

- (1) boneless pork tenderloin (size may vary depending on need)
- (3-5) slices of proscuitto or ham
- (1/2) an apple, thinly sliced (peel can be left on)
- garlic salt and pepper

Preheat oven to 375 degrees F. Pat pork tenderloin dry and lay in a roasting pan. Create a groove in the roast by slicing lengthwise down the roast, making sure not to slice all the way through. Cut an additional horizontal slice on either side of the groove to increase the size of the cavity. Stuff the roast with the mushroom stuffing, packing it down as needed. Season roast with garlic salt and pepper. Lay proscuitto slices on top of roast, making sure to cover the stuffing. This will keep the stuffing moist. Thinly slice the remaining apple and arrange on top of roast.

Roasted Potatoes

- Yukon Gold potatoes (as many as desired)
- olive oil
- Italian seasoning
- garlic salt and pepper

Peel potatoes and cut into uniform wedges. Parboil in salted water for about 10 minutes. Drain and toss in olive oil (enough to coat potatoes). Season with Italian seasoning, salt and pepper. Toss again. Arrange potatoes around pork tenderloin in the roasting pan.

Place roasting pan in 375 degree F oven for approximately 45 minutes (for a roast that is between 1 and 1.5lbs). Leave in slightly longer for a larger sized roast. Cooking the roast too long with dry it out and cause it to be too tough. Remove from the oven half way through to turn potatoes. After 45 minutes, remove roast from the oven and place on a cutting board to rest. Increase temperature in oven to 425 degrees F and finish roasting potatoes. Remove when they are golden brown.

Slice pork tenderloin into round medallions and serve with roasted potatoes and a vegetable of your choice.


Enjoy!

getting started.

Hmmm....where to start. I guess I have been a "foodie" for years now. A "foodie" in terms of my love for food and passion for cooking. Definitely not in terms of my skill, which I must admit right from the start is no where close to any type of chef du cuisine. Chef du "my kitchen" perhaps. I think my passion for cooking really blossomed around the age of 10. I always loved whipping up culinary experiments in my moms kitchen, most of which contained either Velveeta cheese or peanut butter, and most of which also ended up on all four walls of the microwave. 
My experimenting didn't always turn into "kitchen nightmares" though. I actually started a little business at the ripe age of 12, baking and selling Boeterkoek to family and friends. For those of you scratching your heads right now, Boeterkoek is a Dutch delicacy...literally... "butter cake", completely...delicious. Looking back, it was a pretty sweet operation. My mom bought all the ingredients, and I'd rack in $6 for every cake I sold. I wonder if I'd ever be able to find a generous investor like that again...


Nowadays, I'm recently married and living in the heart of downtown Montreal. Married life has proven to be the best gateway for experimenting with cooking and creating recipes, although my husband and his waistline may not agree. Living in the land of bread, wine and cheese doesn't help either ;P. 
I'm definitely a meat and potatoes kind of girl, but I love experimenting with other cultural delicacies as well. With my Dutch background and my husband's Italian heritage, I've definitely been learning to keep the spice in our lives and in our kitchen. We've traveled to Thailand, Mexico, India, Morocco, Indonesia, Italy and of course Holland in the past 6 months without even leaving our apartment! Join us on our journey of flavour.

Lindsay