Pages

Showing posts with label pine nuts. Show all posts

1.19.2012

homemade granola bars.


Soy lethicin, polyglycerol polyricinoleate, hydrogenated modified palm oil, sorbitol...BHT. Just a few of the ingredients in the Quaker granola bar I was eating just the other day. While my general opinion is "if you can't read it...you probably shouldn't eat it", it's almost impossible to avoid some of the additives and preservatives they put in food products these days. While it's very important to be aware of what you're eating and putting into your body, I believe it's all in moderation. There's no sense in worrying about the miniscule amounts of sorbitol in your granola bar...I'm pretty sure no one ever died from eating a Peanut Butter Dipps bar.

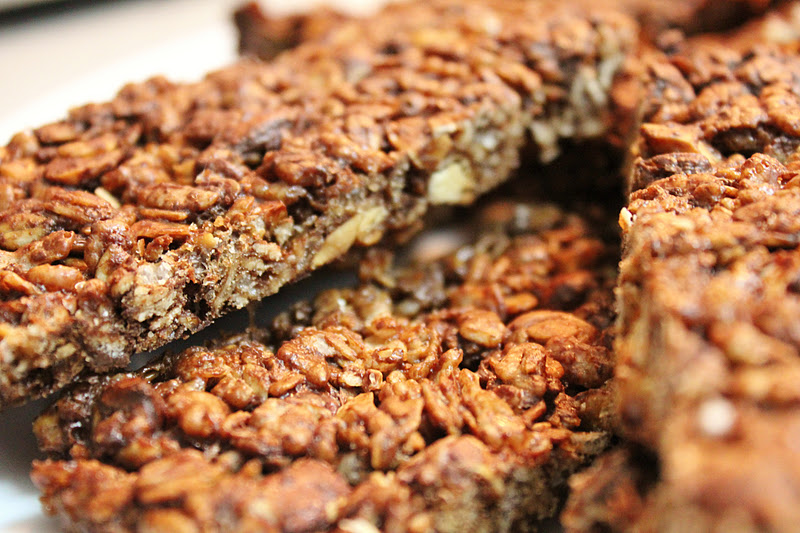
My moto...do what you can. Avoiding pre-packaged foods as much as possible is a good place to start. When you make things from scratch, you can control what goes into the food you're eating. Case in point...these delicious homemade granola bars! Quick, easy and...legible! This recipe is really just a mere suggestion. There's so many things you can do with this recipe...so many variations and flavours. Mixing in cocconut, pistashios, raisins, maple syrup...trying out different cereals...adding in butterscotch chips...peanut butter...anything goes! (within reason off course).


Homemade Granola Bars

- (1/2) cup of whole nuts - almonds, peanuts, walnuts, etc.
- (1/2) cups of chocolate chips or dried fruit, coarsely chopped (cranberries, cherries...)
- (1) cup of oatmeal of high fibre cereal (like Kashi GoLean)
- (1) cup of puffed rice cereal
- (1) tbsp butter
- (1/4) cup of brown sugar
- (1/3) cup of honey
- (1) tbsp vanilla extract
- (2) tbsp of wheat bran (optional)
- (1) pinch of salt


Preheat the oven to 350 degrees F. Prepare an 8x8-inch pan with oil, butter or non-stick cooking spray.

Arrange the nuts on a sheet pan and toast for 10 minutes or until fragrant. Allow them to cool and then give them a rough chop.


Combine the chopped nuts, chocolate or fruit, and cereals in a heat-proof bowl. Use your fingers to separate the fruit if it clumps together. Note that adding the chocolate chips at this point will cause them to melt completely and give your bars an overall chocolatey consistency. If you'd prefer to have the chips mantain their structure, you can try to add them right before baking, after the sugar mixture has been added and had a chance to slightly cool. They may still melt slightly throughout the bars.


Reduce the oven temperature to 300 degrees F. Combine butter, brown sugar, and honey in a medium sauce pan and stir to moisten the brown sugar. Set over medium heat and bring to a boil, swirling the pan once or twice to make sure all the ingredients combine.


As soon as the sugar mixture comes to a full boil and the sugar is completely dissolved, remove from heat. This should take about 5 minutes.
Off the heat, stir in the vanilla, wheat bran (if you're adding it), and salt. Be careful because the sugar will bubble up. Immediately pour sugar syrup over the cereal mixture and use a heat-proof spatula to stir everything together. Make sure the nuts, chocolate or fruits, and cereals are evenly coated. Pour the cereal mixture into the pan and use the spatula or wet fingers to press the mixture into the pan as firmly as possible.


Bake 20 minutes for chewier bars or up to 30 minutes for crispier bars. Allow the bars to cool completely in the pan. Cut into approximately 8 to 10 bars, depending on the size your prefer, with a sharp knife.

 
I wrapped up all the bars individually in plastic wrap so they're good to go for a quick snack. The bars will keep for several weeks in an airtight container, or you can also freeze them and take them out as you need them.


Enjoy!


Lindsay

9.20.2011

the travelling basil.


My goal this summer was to grow some fresh herbs from seed. Being that I love to cook, I know the huge difference it makes when you use fresh herbs versus dried, so I figured I'd give it a shot. How hard could it really be! I've worked in a greenhouse for at least a third of my life, so I must have picked up something along the way. My husband and I made the trip to our local Canadian Tire to pick up some supplies and (after a long debate at the CT about the cost effectiveness of growing versus buying fresh herbs) we were on our way. What are husbands for if not to give you grief when you spend too much money :)
Living in an apartment in downtown Montreal, my little seedlings definitely had some barriers stunting their growth. Not only do we have a very limited outdoor space, but what we have is completely surrounded by three other 12 story buildings. The 10 minutes of total sunshine they received each day may have been the clincher, so yes Tom...you told me so :)
As we like to travel home to the Niagara Region quite frequently, I had no choice but to bring my little seedlings along with me, as sad as they were. It had been over a month and they had barely grown more than an inch or two. There is a reason why Niagara is known as the Green Belt. All it took was a week of Niagara sun and fresh air and my basil were golden! They grew more in the one week we were in Niagara than they had for a whole month in Montreal.
And so the story continues. Every time Joe and I decided to drive home for the weekend, all my basil was loaded into a cardboard box and transported back and forth with us. It became the running joke when we'd pull up to the house after an 8 hour drive and haul a big box of fresh basil out of the back seat! But boy did I end up with a ton of healthy, hearty fresh basil.
As much as I've tried to use my basil all summer long...putting it in salads, tossing some leaves in our pasta, shredding some on top of pizza...I just couldn't use all that I had grown. What better opportunity to make pesto! Pesto works with just about everything. We toss it in our spaghetti, spread it on a pizza crust to make white pizza, you can add it to your eggs...the possibilities are endless!


Basil Pesto

- (2) cups of fresh basil leaves
- (1/4) cup of toasted pine nuts
- (2) cloves of garlic, roughly chopped
- (1/2) cup of freshly grated parmasan cheese or romano cheese
- (1/4) cup of extra virgin olive oil

Lightly toast pine nuts in a frying pan on the stove or in the oven. Make sure to keep an eye on them frequently as they tend to burn quickly (and are really expensive!!!) Set them aside and allow them to cool.


Thoroughly wash and dry all your basil leaves and measure out roughly 2 cups.


If you have a large, quality food processor, you can add all the basil in at once, but if you're working with a smaller food processor or a mini chopper, you will most likely have to do this in batches. In traditional Italian methods you would be chopping everything by hand, but who's got the patience for that :)
I was using a mini chopper, and so I did everything in small batches, adding a little extra basil each time. The goal is to add all the basil, the pine nuts and the garlic into a food processor and pulse until you achieve the desired consistency. You want to end up with a finely chopped paste, but not too finely chopped, pesto should still have some texture to it. Once you have finished processing the pesto, scoop the paste into a seperate bowl.


Finely grate about 1/2 of a cup of fresh parmasan cheese.


Stir both the parmasan cheese and the olive oil into the pesto. You don't want the pesto to be too dry or too oily, so add in the oil a little bit at a time until it becomes moist but not runny.


Now your pesto is ready to enjoy! In a sealed container, you can keep the pesto in the fridge for at least a week, but if you're not going to use it all right away, you're better off to freeze it. I actually took small pieces of Glad Press and Seal (cellophane or wax paper will work too) and made individual packets with about a tablespoon or so in each. I twisted the packets up tightly and threw them all in a ziploc bag together. You can store the bag in the freezer for months, and everytime you want to add a little pesto to your pasta, pizza, or favourite dish...presto...pesto!!!