I found this recipe on Ree Drummond's website. Some of you may know her as "The Pioneer Woman" from her food blog and her show on the Food Network. If you are still lost, follow this link to her blog...her recipes are just ridiculous.
I initially did not have high hopes for this cake. I had never heard of it and was confused by it's name "Tres Leche", as this recipe seems to include "four milks" instead of "three" (I like to count the whipping cream). But after trying it the first time, it has quickly become my go-to "just because" cake. It's a nice light dessert, you can totally make it "just because", but it's good enough to bring over to a friends for dessert. I even made it for my birthday! (Last time I make my own birthday cake though...that's just a rip off!) A friend of mine from Chile, who seems to be somewhat of an expert when it comes to tres leche cakes, is a huge fan of this recipe and has even been known to request I make it on occassion...that must be a good sign!
Tres Leche Cake
- (1) cup all-purpose flour
- (1 1/2) teaspoons baking powder
- (1/4) teaspoon salt
- (5) whole eggs
- (1) cup of sugar, divided
- (1) teaspoon vanilla
- (1/3) cup of milk
- (1) can of evaporated milk
- (1) can of sweetened, condensed milk
- (1/4) cup of heavy cream
- marachino cherries, optional
Icing
- (2) cups of heavy cream, for whipping
- (3) tablespoons sugar
Preheat oven to 350 degrees. Spray a 9 x 13 inch pan liberally with cooking spray or grease with butter until coated.
Combine flour, baking powder, and salt in a large bowl and set aside.
Separate eggs into egg whites and egg yolks.
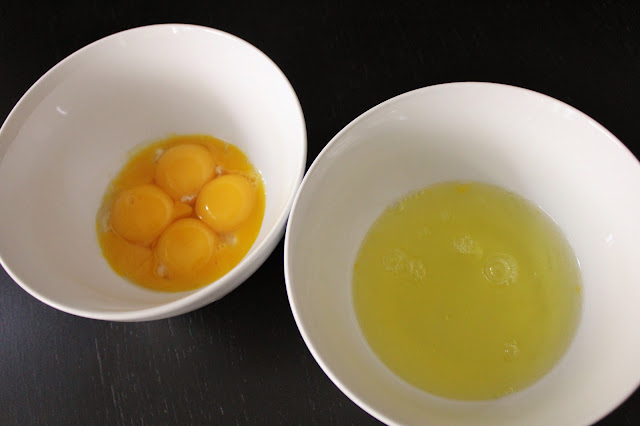
Beat egg yolks with 3/4 cup sugar on high speed until yolks are pale yellow. Stir in milk and vanilla. Pour egg yolk mixture over the flour mixture and stir very gently until combined.

Beat egg whites on high speed until soft peaks form. With the mixer on, pour in remaining 1/4 cup sugar and beat until egg whites are stiff but not dry.
 Fold egg white mixture into the batter very gently until just
combined. Pour into prepared pan and spread to even out the surface.
Fold egg white mixture into the batter very gently until just
combined. Pour into prepared pan and spread to even out the surface.

Bake for 35 to 45 minutes or until a toothpick comes out clean. Turn cake out onto a rimmed platter and allow to cool.

Combine condensed milk, evaporated milk, and heavy cream in a small pitcher.
When cake is cool, pierce the surface with a fork several times. Before piercing, I generally like to move the cake to a rimmed platter or serving tray, so all that milky goodness stays in the cake. When I'm planning on transporting the cake, I like to use this cheapy dollar store plastic container. It's the perfect fit for my 9 x 13 cake and it's easy to travel with.
Slowly drizzle all but about 1 cup of the milk mixture over the cake—try to get as much around the edges of the cake as you can. I personally hate throwing out the remaining 1 cup of liquid, so try it in your coffee! Just remember to skip the sugar as it's plenty sweet enough!

Allow the cake to absorb the milk mixture for 30 minutes. To ice the cake, whip the heavy cream with 3 tablespoons of sugar until thick and spreadable.
Spread over the surface of the cake. Decorate cake with whole or chopped maraschino cherries. Cut into squares and serve.


I've made this cake the day before and it takes just as good! Just put the milk-soaked cake in the fridge over night and wait til the next day to add the whipped cream.
Enjoy!!!
Combine flour, baking powder, and salt in a large bowl and set aside.
Separate eggs into egg whites and egg yolks.

Beat egg yolks with 3/4 cup sugar on high speed until yolks are pale yellow. Stir in milk and vanilla. Pour egg yolk mixture over the flour mixture and stir very gently until combined.

Beat egg whites on high speed until soft peaks form. With the mixer on, pour in remaining 1/4 cup sugar and beat until egg whites are stiff but not dry.


Bake for 35 to 45 minutes or until a toothpick comes out clean. Turn cake out onto a rimmed platter and allow to cool.

Combine condensed milk, evaporated milk, and heavy cream in a small pitcher.
When cake is cool, pierce the surface with a fork several times. Before piercing, I generally like to move the cake to a rimmed platter or serving tray, so all that milky goodness stays in the cake. When I'm planning on transporting the cake, I like to use this cheapy dollar store plastic container. It's the perfect fit for my 9 x 13 cake and it's easy to travel with.
Slowly drizzle all but about 1 cup of the milk mixture over the cake—try to get as much around the edges of the cake as you can. I personally hate throwing out the remaining 1 cup of liquid, so try it in your coffee! Just remember to skip the sugar as it's plenty sweet enough!

Allow the cake to absorb the milk mixture for 30 minutes. To ice the cake, whip the heavy cream with 3 tablespoons of sugar until thick and spreadable.
Spread over the surface of the cake. Decorate cake with whole or chopped maraschino cherries. Cut into squares and serve.


I've made this cake the day before and it takes just as good! Just put the milk-soaked cake in the fridge over night and wait til the next day to add the whipped cream.
Enjoy!!!